Inventory
Manage Transmitters
It allows the user to consult information and perform actions on the transmitters.
This screen consists of:
- Tracker button.
- Download: button that allows to download information of the table in CSV or Excel.
- Search engine
- Filters: located at the bottom of the search engine, allows a narrower search filtering by:
- Site
- Type: 1G o 2G
- Status
- Subestatus
- Dates: registration, installation or withdrawal.
- Groups
- Table, that consists of the following columns: Trasnmitter ID; Type; Site; Installation Date; Status and Substatus.
- Complementary actions, go to explanation.
- Load a file, this button is located at the bottom and right of the screen and allows to manage transmitters massively. go to explanation
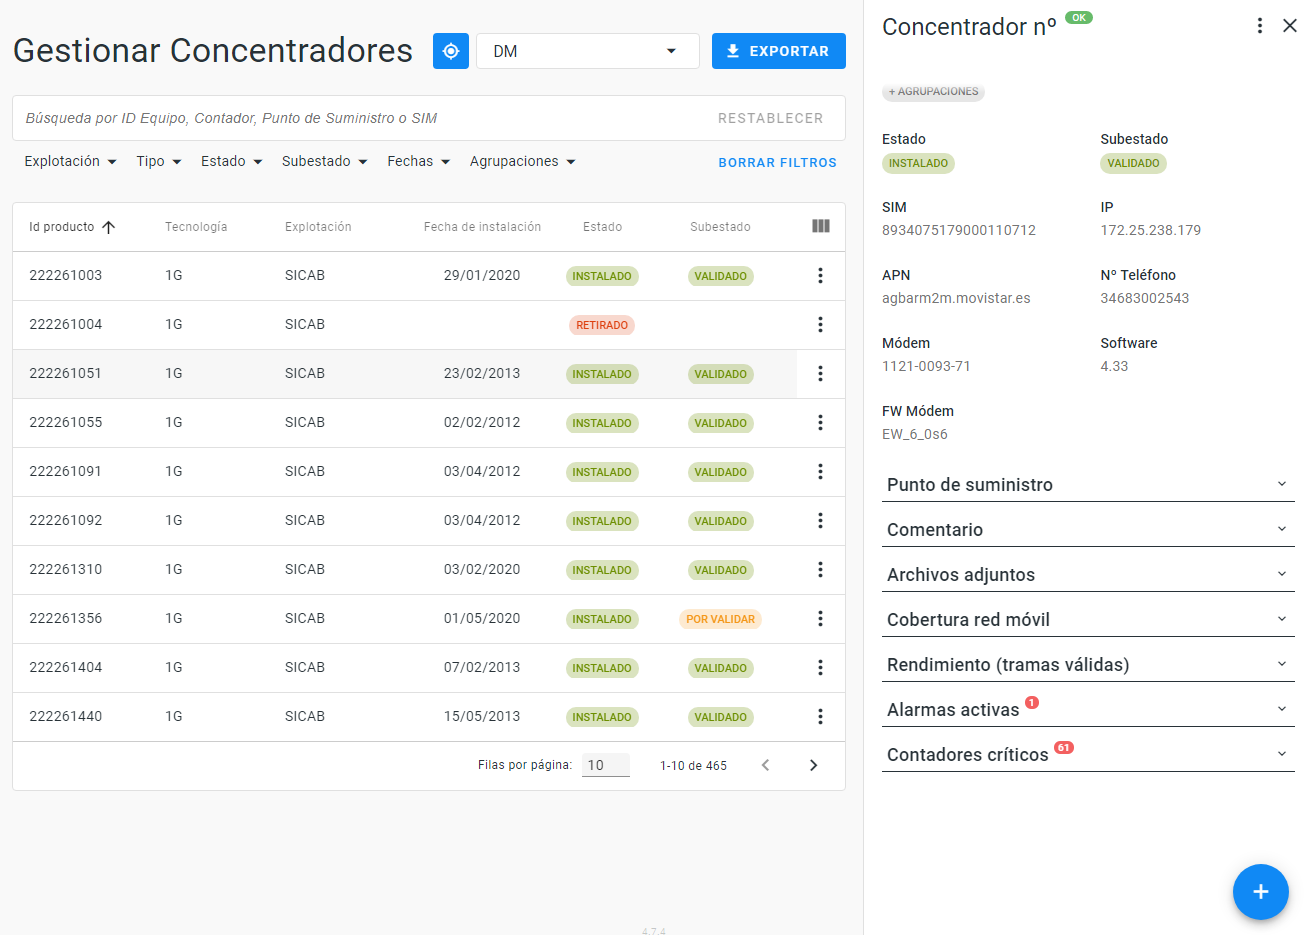
Clicking a transmitter on the table shows a side panel on the right of the screen that allows to:
- Know the serial number and status: OK or KO.
- Modify the status and substation of the transmitter (from "Complementary actions").
- Add comments (from "Complementary actions").
- Create Groups. go to explanation.
- Consult:
- transmitter information: status, substatus, SIM, IP, APN, telephone number, modem, software and FW modem.
- Supply point information: description of Supply Point, geolocate the transmitter on a map, consult the Alias of the Supply Point, the PS ID and the Key PD if it has.
- Comments.
- Attachments: this section allows to upload, consult or delete a file. This section is designed to load a single file for now.
- Mobile network coverage: graphic that informs the maximum value of RSSI with which the transmitter has communicated during the last 15 days.
- Performance (valid frames): graphic that informs the total of valid frames processed by each port of the transmitter during the last 15 days.
- Active alarms: this section informs about the Type of alarm, activation date (day and time) and total active days of the alarm.
- Critical meters: this section reports meter, operation and supply points that only connects through this transmitter.
Manage Devices
It allows the user to consult information and perform actions on the Devices and Meters.
This menú consists of two tabs:
Devices:
This screen consists of:
Tracker button.
Download: button that allows to download information of the table in CSV or Excel.
Search engine
Filters: located at the bottom of the search engine, allows a narrower search filtering by:
- Site
- Technology type: VHF 1G or 2G, BusVHF, iMeter Classic or Electronic and Hydrosense Metering.
- Status
- Subestatus
- Dates: registration, installation or withdrawal.
- Groups
Table, consists of the following columns: Device ID; Meter ID, Tecnology Type; Site; Contract, Status, Substatus, Alias, Control, Major users.
Complementary actions go to explanation
Load file, this button is located at the bottom and right of the screen and allows to manage devices massively. go to explanation.
Clicking a device on the table shows a side panel on the right of the screen that allows to:
- Know the serial number and status: OK or KO.
- Modify the status and substation of the device. (from "Complementary actions").
- Add comments (from "Complementary actions").
- Create Groups. go to explanation.
- Reprocess reading (from "Complementary actions"). go to explanation.
- Set up an iMeter or Hydrosense (from "Complementary actions"). go to explanation.
- Consult:
- Information related to the device: device ID, technology, status, substatus, site, installation date, uninstallation date, and device pulse weight. If the selected device is an iMeter or Hydrosense, the side panel adds information about: SIM, IP, APN, phone num., initial meter index and initial pulses.
- Associated meter/s: this section informs about the SN of the device associated to the meter, date and hour of association. By clicking the SN Meter the information of the side panel changes to the one available on tab Meters.
- Active alarms: this section informs about the Type of alarm, activation date (day and time) and total active days of the alarm.
Depending on the technology, the side panel includes the following information/sections:
VHF:
- initial meter index and initial pulses.
- RSSI coverage.
- Redundancy. This section informs the transmitters from which the device is read.
BUS-VHF:
- read but not linked devices and the position of the meter.
- Level of batery
- RSSI coverage.
- Redundancy.
iMeter o Hydrosense:
- Level of batery
- Mobile network coverage.
- Set up of the device: Last set up (date and hour), Reading rate in minutes and Connection rate.

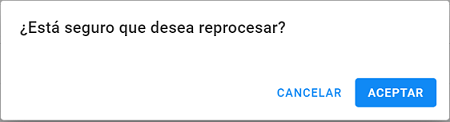
Reprocess readings
In the Devices tab, the Complementary Actions button allows to reprocess a reading with a maximum of six months since when the action is requested. When you select "Reprocess" a pop-up will ask to confirm the reprocessing action.
Set up an iMeter or Hydrosense
In the Devices tab, the Complementary Actions button allows to set an iMeter or Hydrosense. When you select thips option, a pop up with the possible fields to set up appears. Those fields are:
- Reading rate: 1, 5, 10, 15, 30 minutes or 1 hour.
- Connection rate: Hourly, daily, weekly or monthly.
- Dispersion: between 0 to 3.600 seconds.
- Number of attempts: between 0 and 3.
- Time between attempts: between 1 and 45 minutes.
- Meter option: Config 0, 8, 16, 40 or 56.
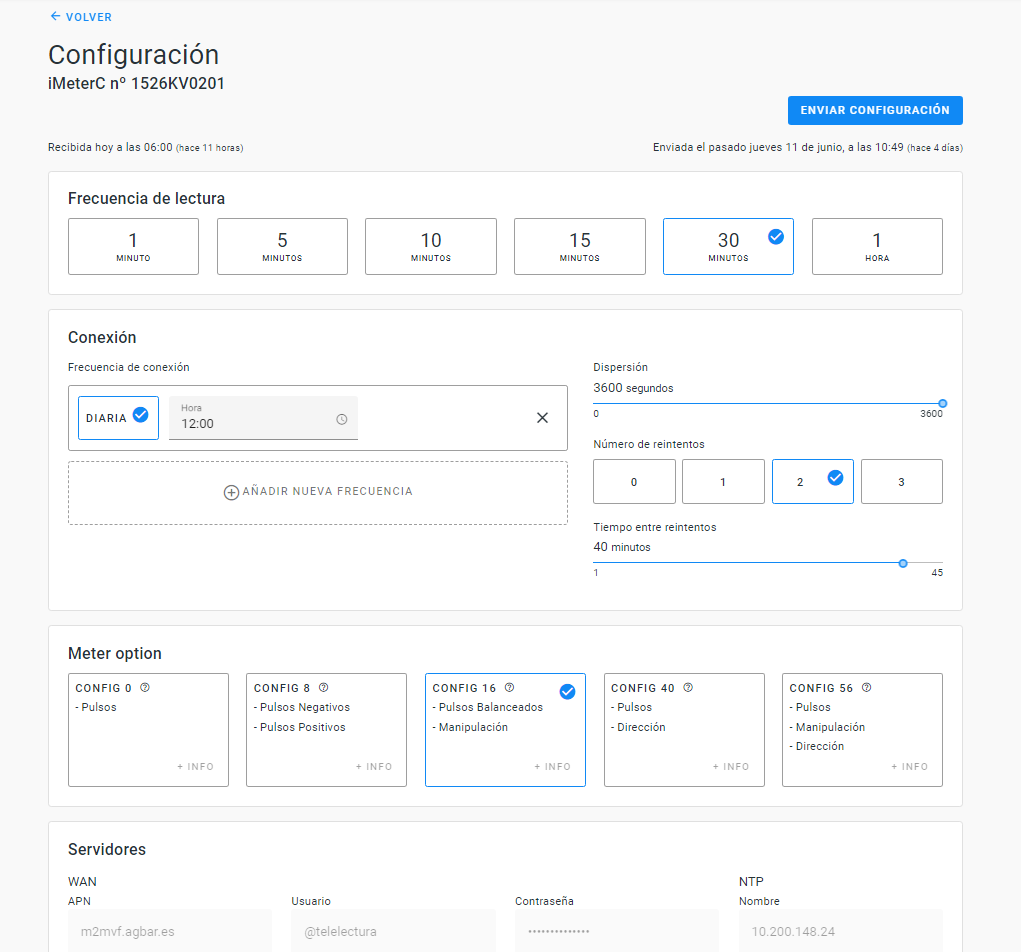
This set up panel shows:
- the configuration received by the device. The top left of the screen shows the date and time that configuration was received.
- the configuration saved by a user. The top left of the screen shows the date and time the user submitted that configuration.
- Does not show configuration. In that case, all fields will be accompanied by exclamation marks.
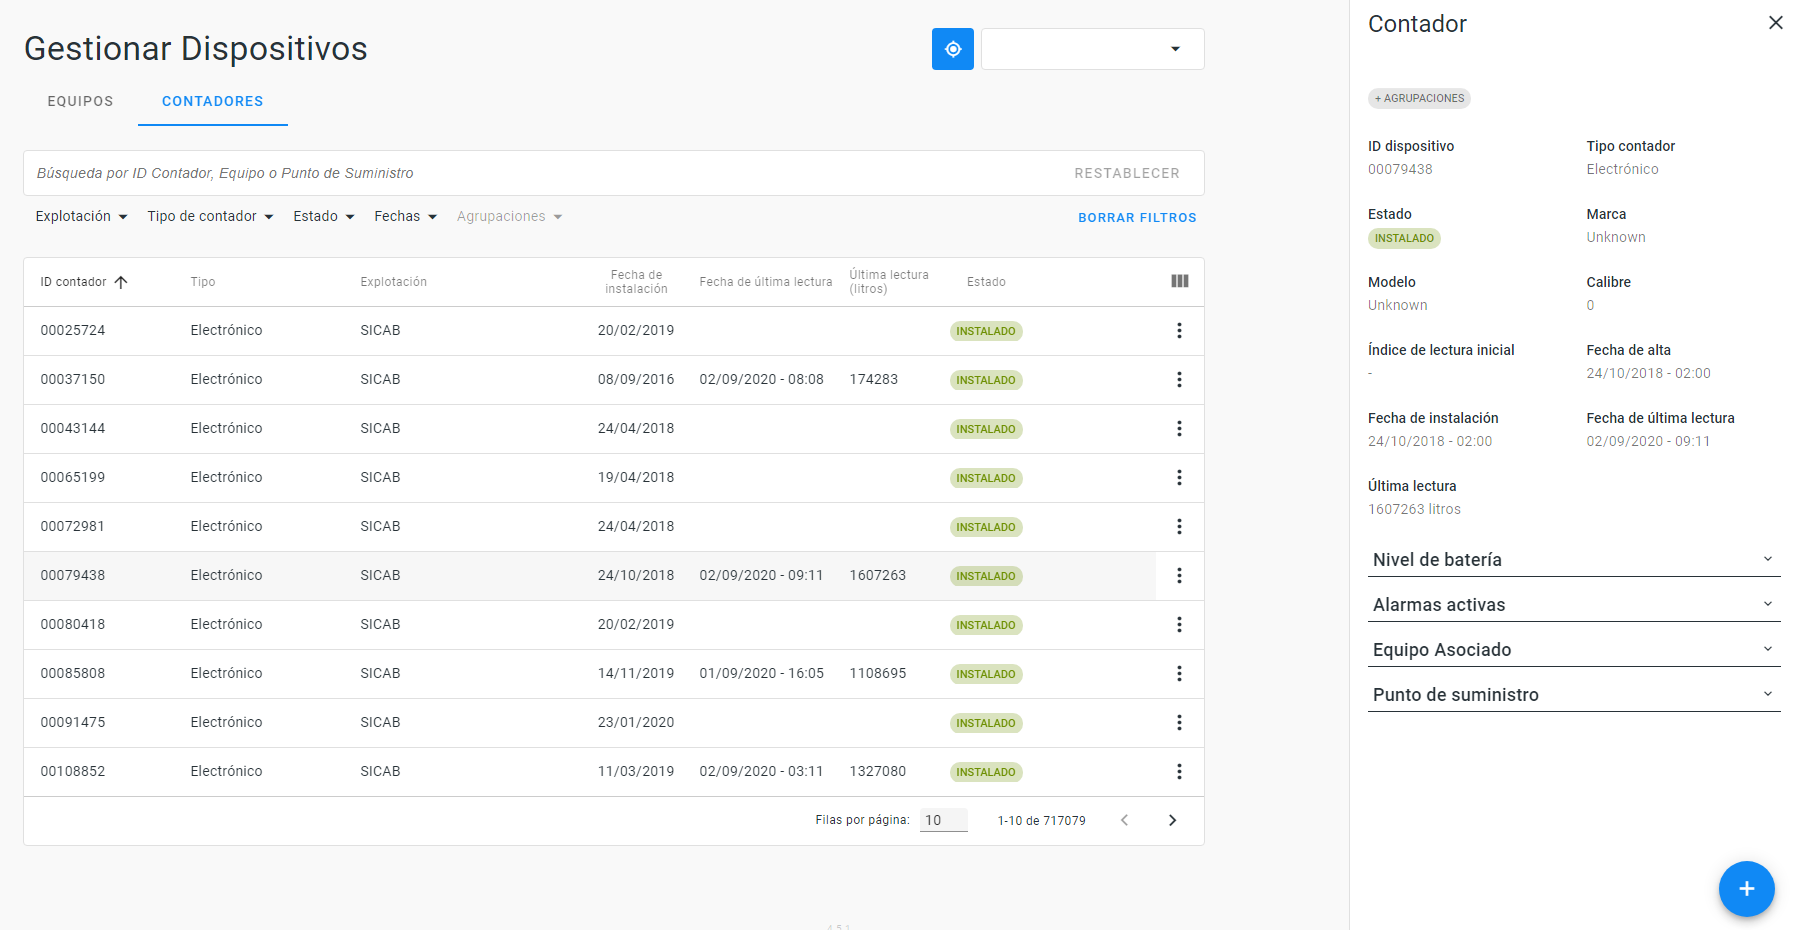
Meters:
This screen consists of:
- Tracker button.
- Download: button that allows to download information of the table in CSV or Excel.
- Search engine
- Filters: located at the bottom of the search engine, allows a narrower search filtering by:
- Site
- Type of meter: mechanic (SPDE or Not SPDE) or electronic (SPDE or Not SPDE).
- Status
- Subestatus
- Dates: registration, installation or withdrawal.
- Major users
- IOT Status
- Groups
- Table, consists of the following columns: Meter ID; Device ID, Type; Site; Contract, Status, Substatus, Installation date, Last reading date, Last reading, and other commercial data related to the meter and supply point.
- Complementary actions go to explanation
- Load file, this button is located at the bottom and right of the screen and allows to manage Meters massively. go to explanation.
Clicking a meter on the table shows a side panel on the right of the screen that allows to:
- Know the serial number and status: OK or KO.
- Add comments (from "Complementary actions").
- Enter a reading (from "Complementary actions").
- Create Groups. go to explanation.
- Consult:
- Information related to the meter: meter ID, type, status, substatus, brand, model and nominal size, las reading date, last reading, installation date, uninstallation date, meter pulse weight, etc.
- Associated device: to those meters associated to a device, this section informs about the SN of the associated device, date and hour of the last reading (in liters).
- Active alarms: this section informs about the Type of alarm, activation date (day and tim
- Supply point: this sections informs about : the description of the Supply point where the meter is installed, alias, KEY PS, ID PS and other comercial data such as: sector, subsector, contract, major user, etc.
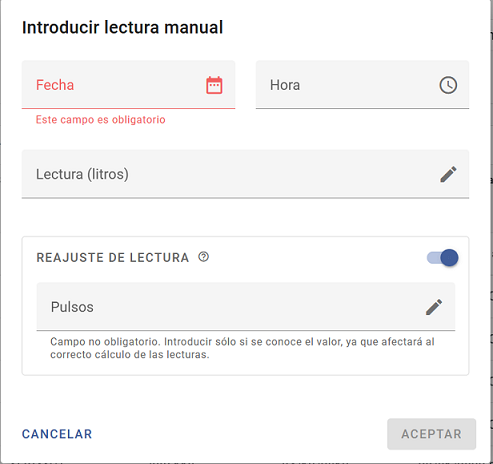
Enter a reading
In the Meters tab, the Complementary Actions button allows to enter a reading. When you select thips option, appears a pop up screen where you have to inform:
- Date and hour of the reading
- Reading (in liters)
The pulses for the indicated date and time can also be reported. This section is optional. If pulses are not reported, they will be obtained from the pulse history stored by the system.
In case of wanting to perform a readjustment, the user must activate the Reading Readjustment check. In case of not having pulses in +-12 hours close to the indicated date, the readjustment will not be carried out.